
5 Expert Tips for Hanging Your Artwork
Do you feel like your house really feels like home? One simple way to personalize your space and give it a personality that reflects yours is to use artwork with intentionality and confidence. The truth is, when well-chosen, well-positioned art invites you into a home. It’s pleasing to the eye, and many times to the heart and soul as well. If you need help finding more meaningful artwork check out this article here. Whether hanging a grouping of pictures for a gallery look, or hanging a pair of like pictures, you will want to be purposeful about your approach to hanging artwork in your home.
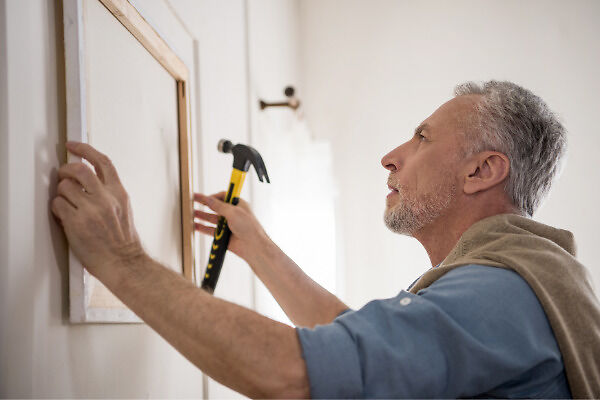
Maybe you’ve tried the short-cut method by just eyeballing placement and “going for it” with a hammer and nails. Admittedly, we’ve learned the hard way that this plan only leads to frustration and a constellation of holes in the wall. To avoid the temptation to cut corners when decorating with art, follow our five expert tips on hanging artwork. We’ll help you with how to choose, arrange, and hang your artwork for an attractive and satisfying result.

Equip Yourself with the Right Equipment
The first order of business when hanging artwork is to gather all the items you will need for your project. You will need picture hangers in various sizes. Our favorite picture hangers are the brass hooks with two or three holes for nails, typically included in the package.
Good quality picture hangers of this kind are available at home improvement stores, hardware stores and superstore retailers. You’ll also need a tape measure, your favorite hammer, a pencil for lightly marking the wall, and a level. We also recommend a roll of kraft paper or paper grocery bags which we’ll explain the use of in tip 3.

Map Out a Pleasing Visual First
Before you start swinging the hammer, take time to decide on the artwork you’ll include on your wall. Often, one large piece creates a stunning focal point, in an entryway or dining room, for example. Consider flanking the statement piece with tasteful sconces which not only dials up the design, but also adds an eye-catching finish to the look. When decorating with several pieces of artwork you’d like to feature in a grouping, you should arrange the pieces on the floor until you find a pleasing composition. Don’t skip this step! I repeat: don’t skip this step! Your eye will inform tweaks and changes in the arrangement and result in an overall gallery wall you’ll enjoy for years to come.
Now, eyeball your wall size. Avoid choosing a small piece for placement in the middle of a large wall. The piece will seem lonely and the wall will appear unfinished. If this step is hard for you, take help from the many internet images you can quickly scroll through as you pinpoint what speaks to you. No need to reinvent the wheel. If you see a grouping you like, ask yourself why.
Is it the picture sizes, frame choices, subject matter? Use the answers to these questions to direct your own choices of artwork, grouping details and wall placement. Another caveat we want to mention is to avoid hanging a single picture too high.
This is a common mistake made when a homeowner is hanging artwork. A good rule of thumb suggests hanging the piece at eye level with its center 57-60 inches off the floor. For a gallery of pictures, work with the furniture in the space, such as a sofa or a chest, as you determine proper placement. A two story great room or a home with high ceilings may allow for arranging artwork slightly higher.

Test Run
We cannot stress enough how important it is to do this step before continuing with your project of hanging artwork. Cut a piece of kraft paper to the size of each picture you intend to hang. Using painters tape or masking tape to secure the back of each corner, so as not to damage your walls, ‘hang’ the brown papers as you think you want the artwork. This is especially important when you are creating a gallery wall with several pictures. You now have the freedom to move the stand-in art so that you can be sure about the positioning of each piece.
Step back to evaluate your single statement piece, or the whole vignette, in cases where you’re hanging two or more pieces. Live with the brown paper art on your walls for a few days. Be sure that the arrangement pleases your eye. Make adjustments as you see fit before you begin driving nails into your walls!
Hanging Artwork on Walls
Now that you’ve done the unglamorous, but necessary, pre-hanging steps, it’s time for the fun part: grabbing your tools and hanging your artwork! It’s helpful to do this with another, but you can also achieve this on your own. Take your time. Use a pencil to lightly mark the spot where your nails will go.
Be sure to determine the proper measurement with the picture wire on the back of the artwork pulled taught. The entire undertaking of hanging artwork can be a tedious process, but you’ll appreciate your investment of effort when your walls come alive and transform the house into your home.

Use a Level
Spotting can work, but we suggest you go for peace of mind by using a level to confirm that each piece actually hangs level. While we’re on the subject, we’ll mention a pro tip that’s worth its weight in gold: for large artwork, use one hanger on each side of center so that the piece doesn’t tilt. There’s nothing more frustrating than a big piece of art which refuses to hang straight.
Hanging pictures can be a daunting task, but if you follow our five tips for hanging artwork, you’ll knock out the job in a weekend, or maybe even a day! We’ve thought it through so you don’t have to. So now is the time to be creative, breathe life into your spaces, and savor the fruit of your labor day after day!
Some Artwork For You To Consider

Harvey Kidder’s “Charleston Charm”

Salvador Caballero Original Oil Painting

Lori Waterman’s Signed Print
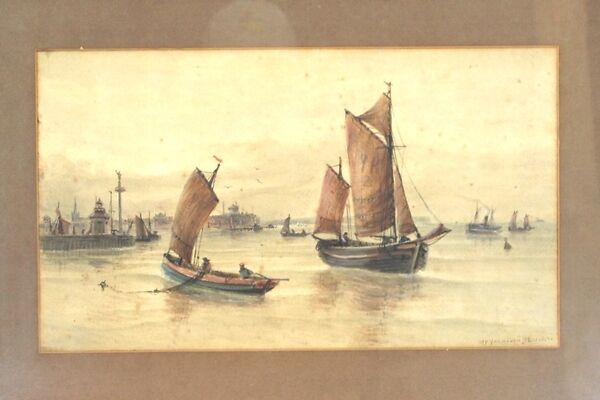
J. F. Branagan Yarmouth’s Watercolor Painting


